HOW TO DIY GIANT PEGBOARD!
Since posting our kids creative art space, I've been asked countless times where we found the giant pegboard!
We didn't buy these pegboards but had them made especially for the space. Instead of replying to each one of you, I thought writing a short post explaining our process could help all of you if you are interested in creating this look for your own home.
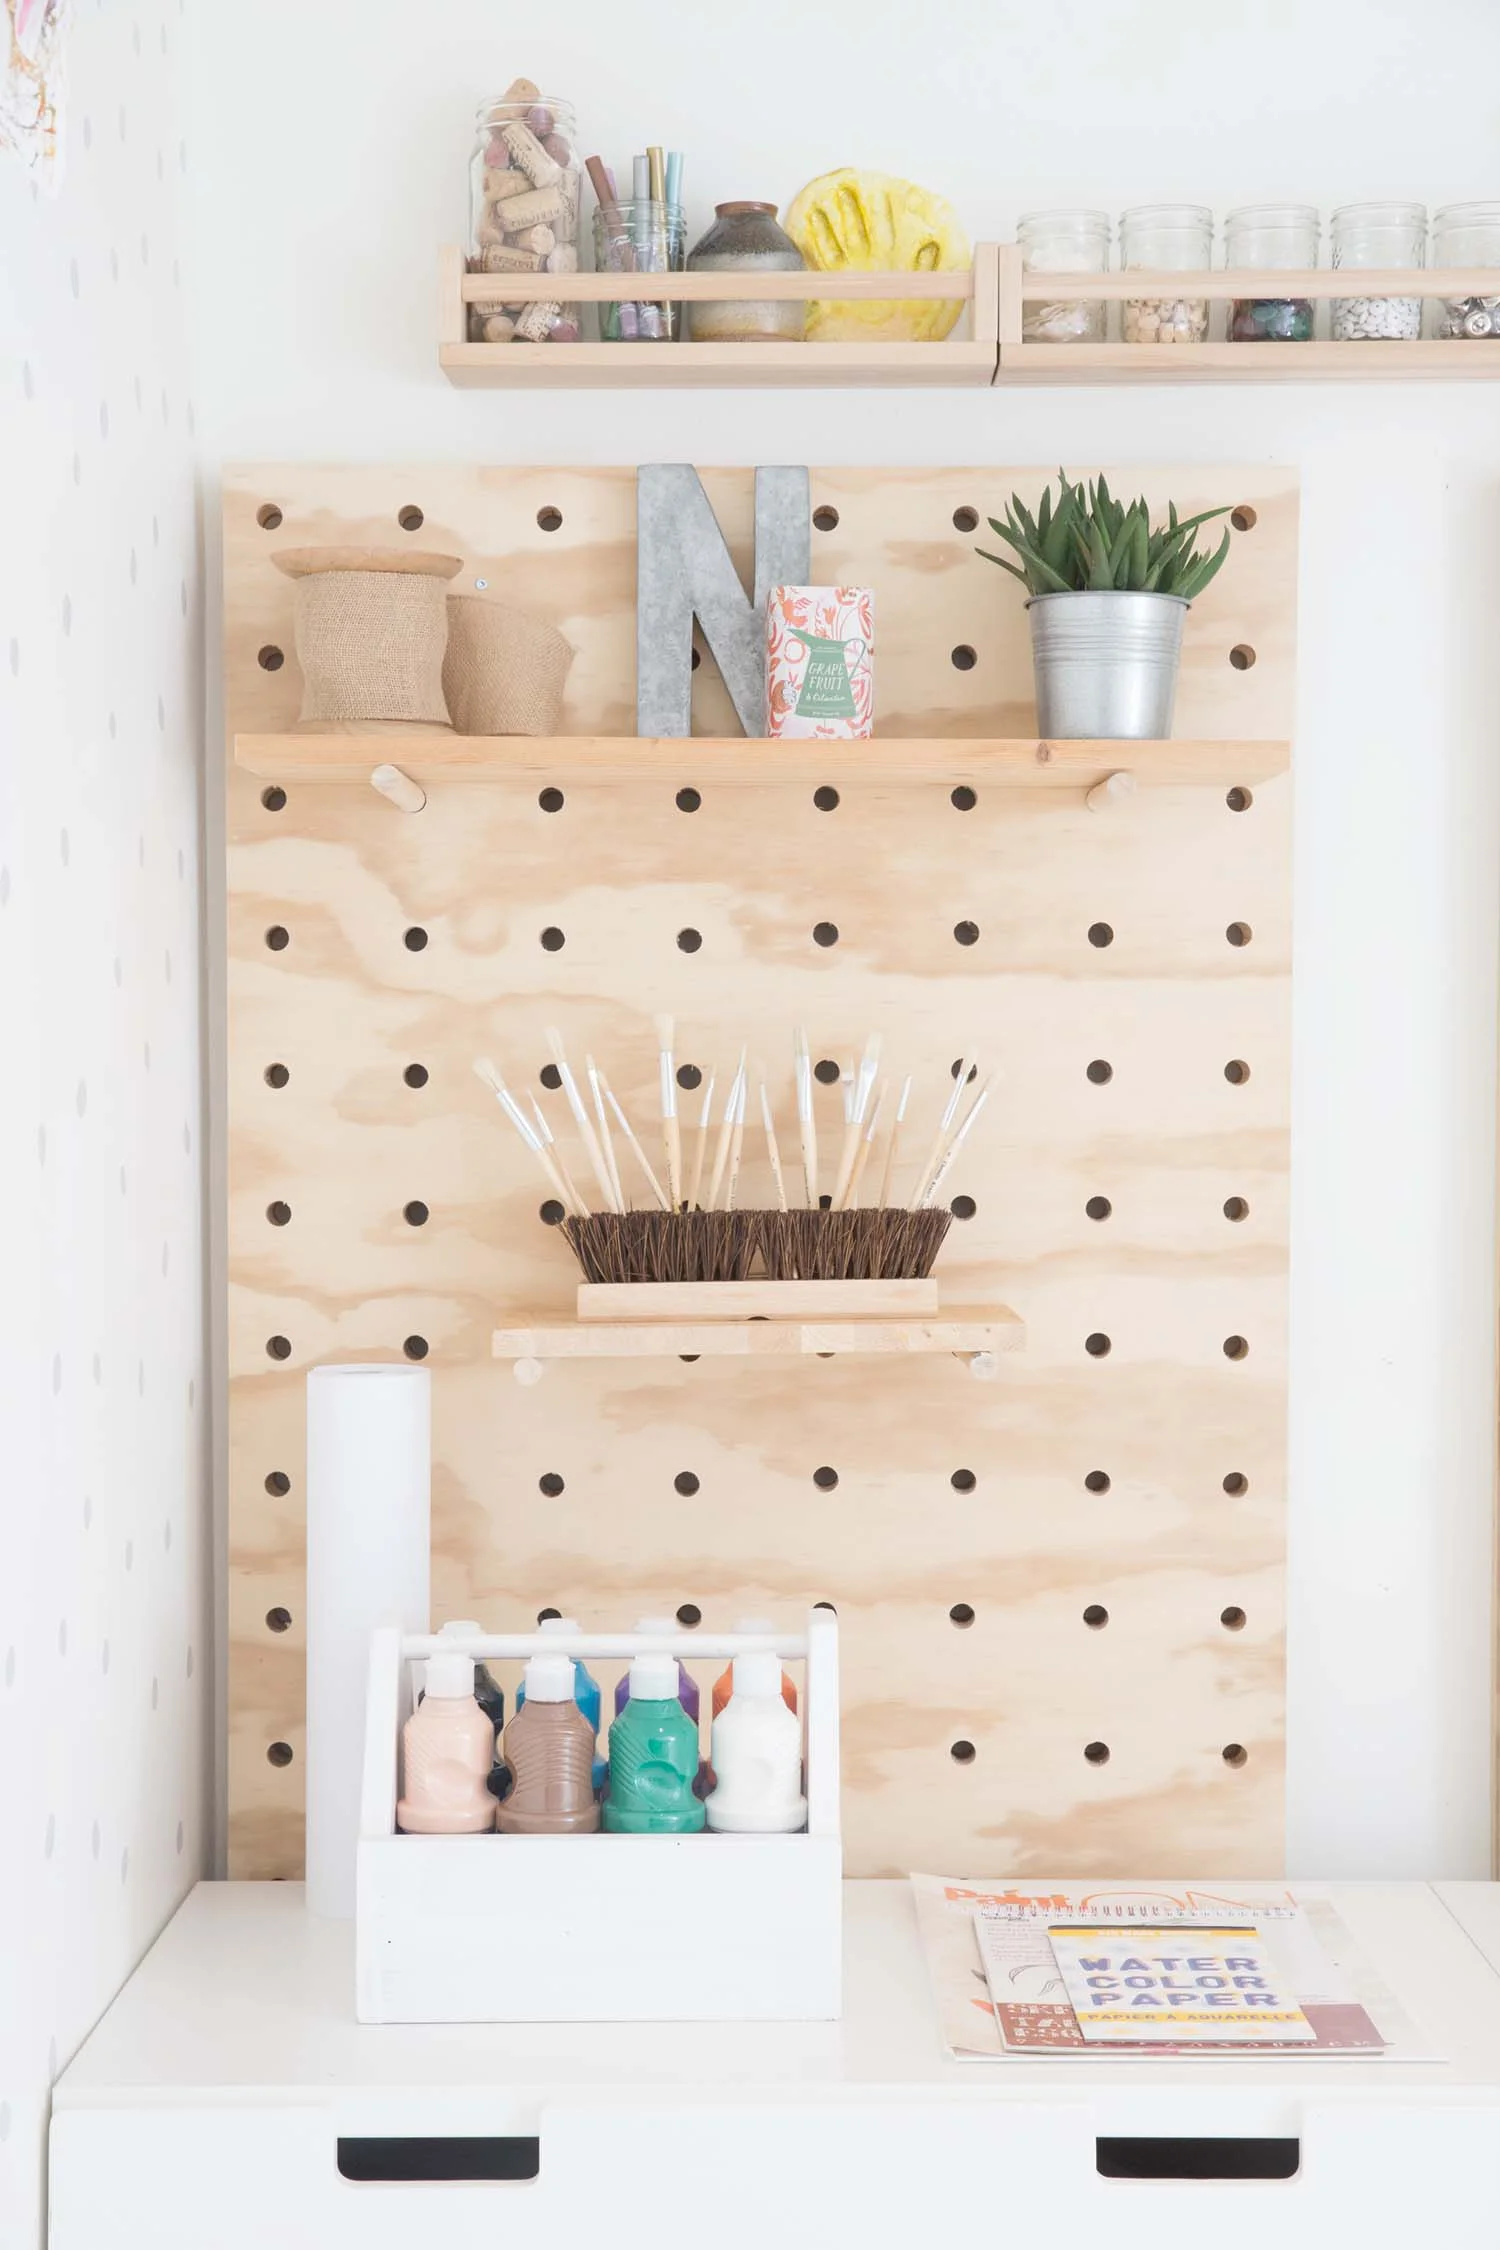
I started by using this amazing tutorial and modified it by adding a second board behind the first so that we could have shelves that hold much more weight, as you can see in the photo below.
Once the wood was purchased and cut (thanks Home Depot!), the next step was marking out where the holes would go and we did this with a black Sharpie marker and level. I decided on making the holes 4 inches apart and at least 2 inches from each edge and ensured the top holes were started at the same point on each board (so that it would look right to the eye once mounted).
With two boards, it allows the dowel to go through both boards and will therefore hold more weight. I also wanted a way to know if the kids had pulled a dowel out without the entire shelf falling to the floor. So far, nothing has moved an inch so it seems the boards are very solid yet still appear streamlined!
The boards are quite heavy and so the back board is drilled into a stud in at least one place on each pegboard and the front board is drilled onto the back board with a small piece of wood between to allow a bit of space and provide extra strength. All boards are sitting on a 2x4 at the bottom behind the storage drawers to add an extra support.
If you have any questions at all, please add them to the comments and I will answer them there!

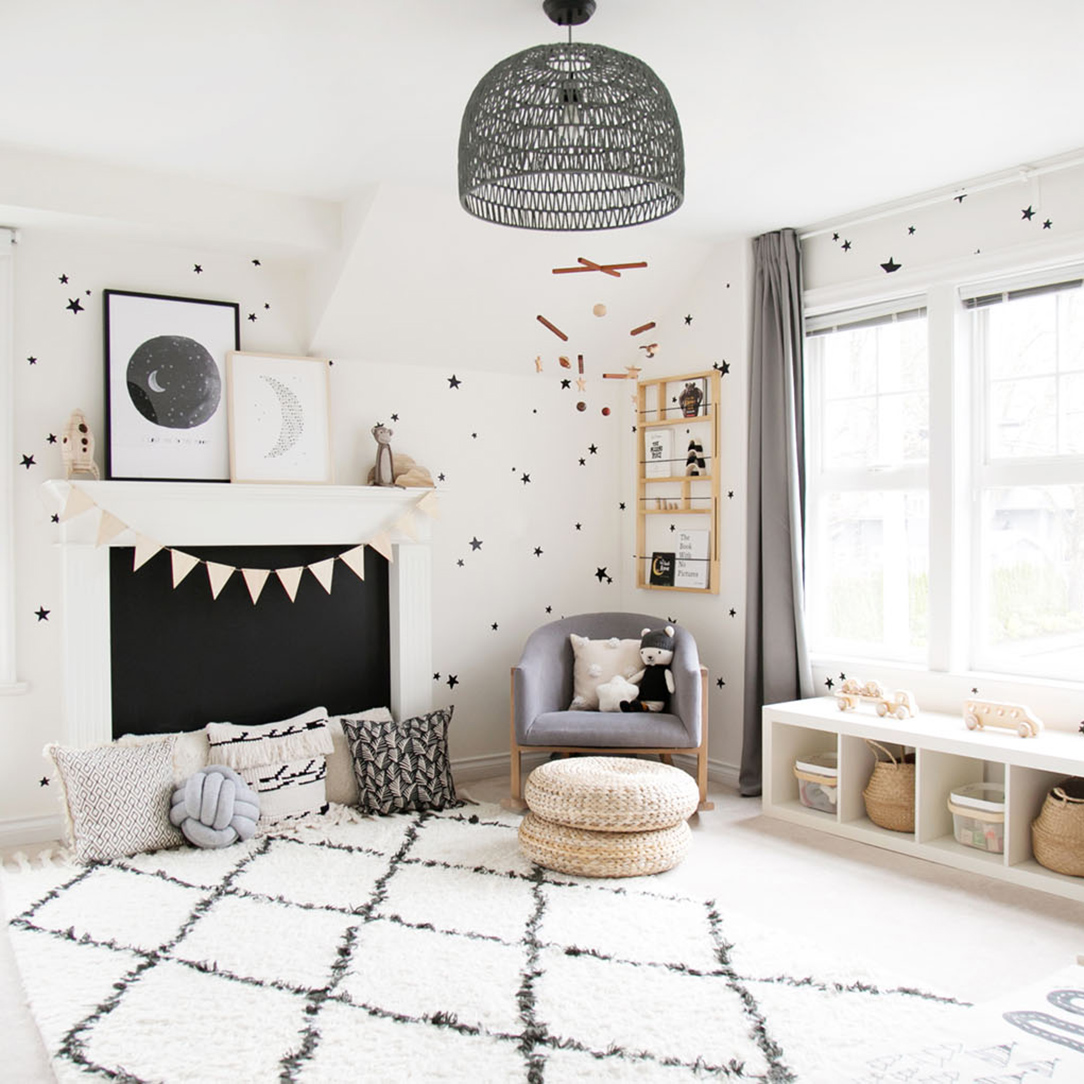
GET THE LOOK {KIDS ART STUDIO}

I am beyond thrilled that our kid's creative art space inspired some of you to think about creating nooks for creativity in your own homes! I find so much joy in knowing the work I do helps your little ones. I have been getting questions about where various things are from so thought I would share where to find the basics of this room!
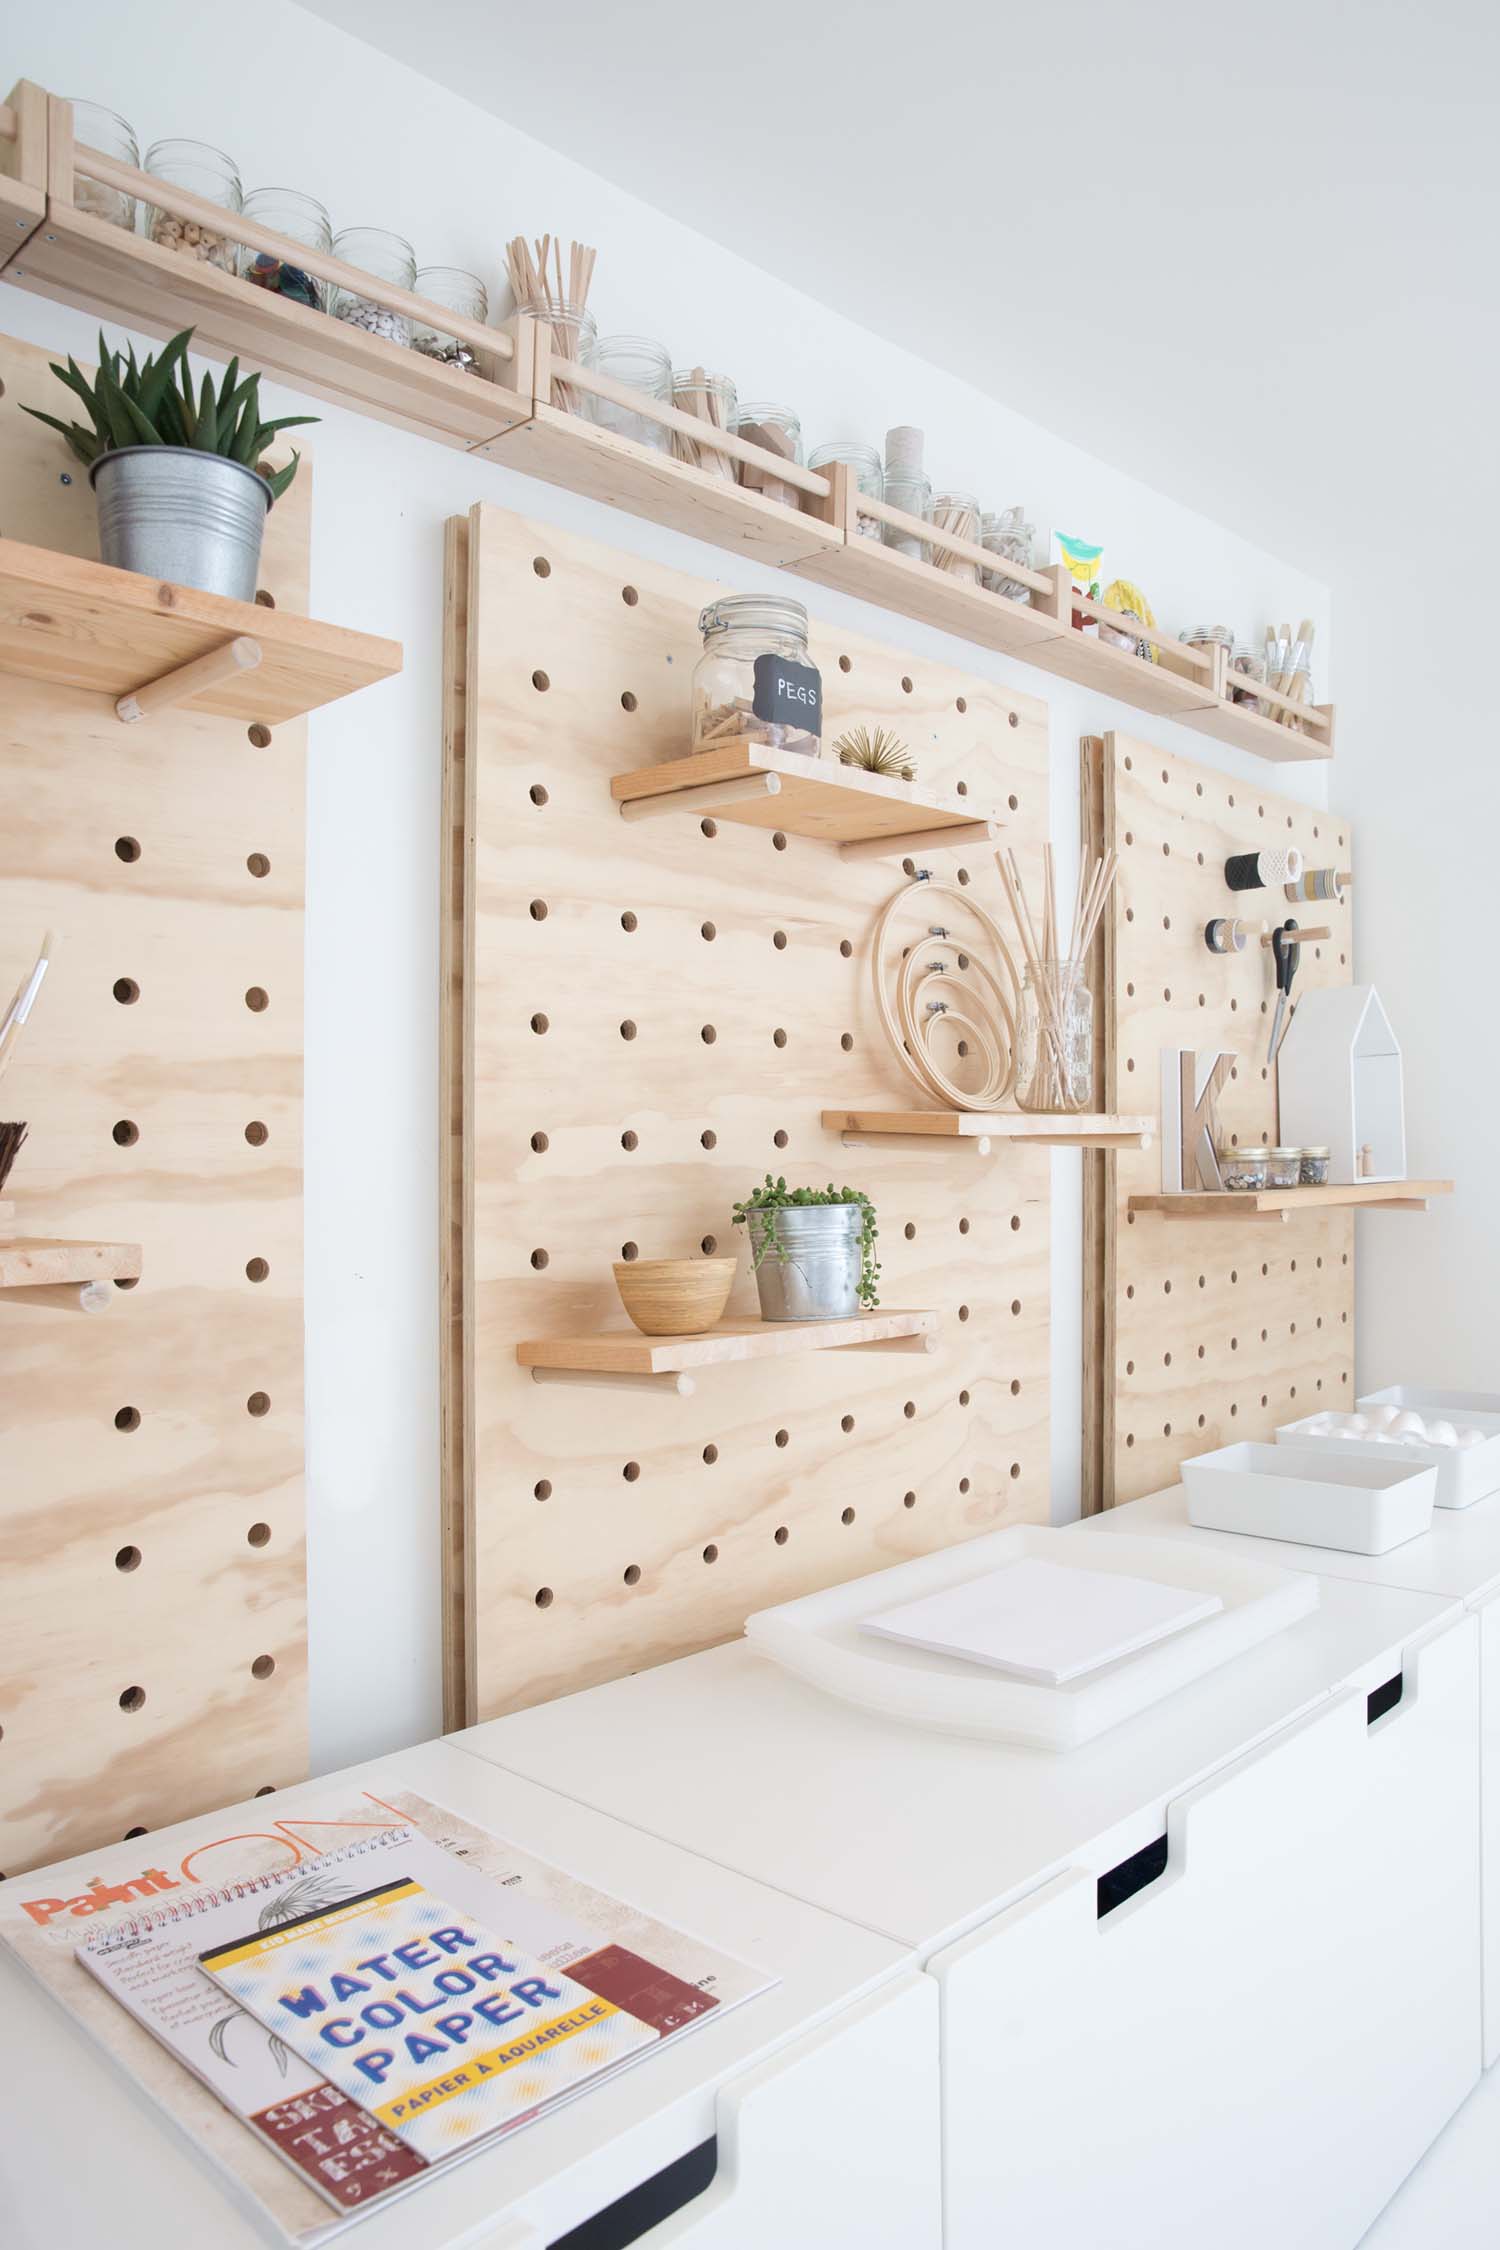
A couple of weeks ago, I shared all of our favourite art books for kids as I felt it deserved a post of its own! I've also been asked to share how we made the pegboards; these were a project themselves but turned out so well. Holes were individually drilled into two sheets of plywood (with a piece of wood wedged in between) so that the dowels would be able to support a good amount of weight.
Many of the big pieces are IKEA as this room is a basement rough space, and we decided we wanted pieces that truly didn't matter if paint was splattered on!!! As this is a space for the kids to be free, the point is that it IS messy...and that's ok.

01. // Clear acrylic shelves; 02. // Multi-sized paintbrushes; 03. // White wipeable chair; 04. // Ceramic wall vase; 05. // Graphic laundry basket; 06. // White drawer storage; 07. // Cactus art print; 08. // Clay rolling pin; 09. // Wipeable art table.
If you have questions about any other item, please leave them in the comments and I can answer for everyone to read. More than happy to share.
May your weekend be full of creativity and a little messy playfulness :) Happy Friday everyone!
HELLO!
WINTER DAISY was created when Melissa Barling was laying on the couch while pregnant with twins. She dreamed of a beautiful baby room but couldn't get up and make it happen. The babies were born and in those mid night wakes and early morning feeds, she decided to leave her corporate job to start a design studio + blog. Welcome to WINTER DAISY.
Follow along on Instagram
POPULAR POSTS...


CATEGORIES
- BOOKS WE LOVE
- BOYS ROOMS
- DESIGN TIPS
- DIGITAL
- DIYs
- EFFICIENT MAMA
- FAVOURITE FINDS
- FREE PRINTABLES
- GARDENING WITH KIDS
- GIRLS ROOMS
- GIVEAWAYS
- HELLO
- HOLIDAY
- HOMESCHOOL SPACES
- HOW TO...
- I'M MELISSA
- INSPIRATION
- KID STYLE
- KIDS ROOMS
- MINI GATHERINGS
- MY FAMILY
- NURSERIES
- OH MONDAY!
- ORGANIZATION
- PICKS
- PLAYROOMS
- RECIPES
- RENTAL HOUSE
- RENTAL HOUSE #1
- RENTAL HOUSE #2
- RENTAL HOUSE #3
- REVIEWS
- ROUNDUPS
- SHARED ROOMS
- SHOPPING
- SHOPS WE LOVE
- STYLING
- TODDLER ROOMS
- TRENDS
- gift guide
SUBSCRIBE
Disclosure
WINTER DAISY BLOG contains affiliate links as well as advertising banners. I may receive a small commission on purchases made through links from this site. The content is always reflective of items, things and experiences that I genuinely like and I only work with companies whose aesthetic is in line with the WINTER DAISY brand.
Sponsored posts will always be clearly disclosed.